Thursday, January 31, 2013

Graham crackers

Many of you know, I'm always looking for delicious, healthy snacks for my kids.  I was so excited to come across this one; Graham Crackers.

Now I'm not apposed to prepackaged graham crackers.  There are a lot of good brands out there, even organic.  But I really feel good about making something like this from scratch and putting it in the kids lunch boxes for school.  Plus, it's a lot more fun making them together.


Full of basic, healthy ingredients such as honey and whole wheat flour.  This recipe makes a lot of cookies, depending on the size cookie cutters you use and how thick or think you roll out your dough.  The thinner the dough, you get a more cracker consistence.  Thicker the roll, more like a cookie.

 
I used my woodland creature cookie cutters.  What kid wouldn't like seeing a squirrel, snail or even a bear in his or her lunch box?
 
 
These crackers are great along size some dried apples.  Don't forget the milk for dunking!

Graham Crackers - Via Weelicious
1 cup whole wheat flour ( I used ww pastry flour)
1 1/2 cup all purpose flour
1/2 cup dark brown sugar
1/2 tsp salt
1 tsp ground cinnamon
1 tsp baking soda
1 stick ( 1/2 cup) unsalted butter, chilled and cubed
1/4 cup honey

1. Preheat oven to 350 degrees
2. In a food processor or standing mixer, combine the fours, brown sugar, salt, cinnamon, and baking soda
3. Add the chilled butter to the mixture and pulse/mix until the mixture resembles coarse meal.
4. Add the honey and 1/4 cup water and continue to mix until well combined.
5. Removed the dough, shape it into a flat disk, and place it between two large pieces of parchment paper.
6. Roll out the dough 1/4" thick. Cut into crackers or shapes.
7. Place the crackers on a Silpat or parchment-lined baking sheet and bake for 15 minutes.  They're a little soft when they come out of the oven, but they firm up nicely.
8. Cool and serve.  Store, covered, on the counter for up to 1 week or up to 2 weeks in the fridge.

Wednesday, January 30, 2013

Sunday Family Dinner

For as long as I can remember, Sunday always meant Family Dinner.  Going to my grandparents for a large meal, sitting around the dinning room table and enjoying each others company....these are fond memories for me.  I still do the Family Dinner today with my family.  Even it's just the four of us, making a meal together, sitting around the table and enjoying each others company. 

One of our favorite Family Dinner is homemade spaghetti. It's a labor of love, a lesson in patience but so worth it!

I'm quite amazed that two simple ingredients, semolina flour and eggs, can make something so delicately delicious. 


As I said before, making spaghetti from scratch is a labor of love.  There's a lot of rolling to be done for the dough to reach the right thickness.


But, it really is the kids most favorite part.  Watching the golden dough enter the pasta machine at one end and come out thinner on the other.  Roman has fond memories of using a pasta machine in preschool to play with play dough.

 
Beautiful golden sheets of pasta. You must let the sheets dry a bit before sending them through the machine again to cut into their gorgeous ribbons.


I love my pasta "drying rack".  It's quite it's own art display; a sculpture of sorts, that I leave out in the kitchen.
 
 
The end result....a delicious bowl of fresh spaghetti! 
 
 
So worth the wait!

Tuesday, January 29, 2013

Food Fraud

Recently I heard a news story about 'Food Fraud';  foods that are vulnerable to fraudulent manipulation in today's food market.  Everything from oils to seafood, spices and even tea bags!  I'm linking here an article to shed light on what 'Food Fraud' exactly means.

Although none of this information is exactly new, it does make you think about what you're eating and feeding to your family.  For reasons such as this, I choose to make meals, snacks, desserts from scratch instead of the "more convenient" processed packaged options.  That's not to say I never use a prepackage form of something on occasion (occasion being the key word), but to know exactly what I'm putting into the food I'm making and where these ingredients came from, the majority of the time, to me this is priceless.

Just some "Food for Thought".

Monday, January 28, 2013

Chocolate Heaven!

There's nothing quite like a chocolate craving. It can be as intense as chocolate itself.

When I'm having a craving, this is my go to dessert.  Chocolate Chip Pound Cake is the ultimate in chocolate satisfaction.  A bit of mascapone cheese gives it a slight tang.  One recipe produces 2 loaves, perfect for instant gratification and freezing for the next craving!

I love to serve this along with fresh fruit for a well rounded snack for the kids.


5 ounces unsweetened chocolate, chopped
1/3 cup mascapone cheese at room temperature
2 1/4 cups of sugar *
1 cup of vegetable oil*
3 large eggs
1 tablespoon pure vanilla extract
3 cups all purpose flour
1tsp baking soda
1 tsp salt
1/2 tsp baking powder
3/4 cup semisweet chocolate chips

*This may seem like a lot of sugar and oil, but remember, you will get 2 larges loaves from one recipe.

Place a rack in the center of the oven and preheat oven to 325 degrees.  Grease and flour two 9x5 inch loaf pans.

In a small saucepan, combine the unsweetened chocolate and 1 cup water.  Place over medium-low heat and stir constantly until the chocolate is melted, about 2 minutes.  Set aside to cool for 2 minutes, then whisk the mascapone until the mixture is smooth.

Beat the sugar, oil, eggs, and vanilla in a large bowl for 30 seconds.  Stir in the chocolate-mascapone mixture.  Whisk the flour, baking soda, salt, baking powder, and chocolate chips in a medium bowl.  Add the dry ingredients and stir just until blended.

Divide the batter among the prepared pans and bake for 55 to 60 minutes or until a tester inserted in the center of each loaf come out clean.  Cool in the pans for 5 minutes, then turn out onto a wire rack to cool completely.  (If you plan to freeze the cakes, wrap them well in aluminum foil once they are cool.)

Thursday, January 24, 2013

Long days

First and for most I want to apologize for not posting here regularly. This has been a hectic winter for my family and I.

More work days have been much busier, my wallet is thankful. A steady stream of appointments for taking care of people in their time of need. This fills my heart.

It's also been a rather virus filled winter for us. Strep throat (twice) for the mister, flu for the rest of us and now the common cold has taken residence in our bodies as well.

I miss this space. I miss sharing with you the yummy, healthful foods I continue to make for my family, especially now when our immune system so needs it.

I hope to carve out some time this coming weekend to write, photography and share with you all soon.

Until then, I hope this post finds you well. I will be back, I promise!

Alyssa~

Tuesday, January 15, 2013

Busy Days

I'm finding that my days are becoming increasingly busy.  Work, volunteering, mothering.... I know you understand; because I'm not alone.

And in these busy days; the idea of getting a healthy meal on the supper table is extremely daunting.
Last night, after a filled with work, grocery shopping, kids, and walking an antsy dog (all on a 60 degree day in January - Hello!) I did manage to get dinner to the table.  Not all of it was homemade and this I need to say "It's OK".  Who I am and where I am - I am enough.

Rotisserie Chickens from the grocery store are delicious; according to my family. They are affordable, you can get some that are Organic or at least All Natural, and they're EASY!

I paired this up with rice pilaf and Spinach Bites.  Bite sized nuggets of spinach and cheese.  What's not to love.

Spinach Bites - Courtesy of Weelicious
20 Bites
Olive oil
2 tablespoons unsalted butter
1 small yellow onion, chopped
1 garlic clove, minced
2 large eggs
1 cup low-fat or full-fat ricotta
1/2 cup shredded mozzarella
1/2 cup grated Parmesan
One 10 oz package of chopped spinach, defrosted and well drained
1/4 tsp salt.

1. Preheat oven to 350 degrees and coast 20 mini muffin cups with cooking spray
2. Melt the butter in a small saute pan over medium heat.  Add the onion and cook for 4 minutes, or until tender
3.Add the garlic and saute for 1 minute, the set aside to cool
4. Whisk the eggs in a bowl.  Stir in the ricotta, mozzarella, and Parmesan cheeses.
5. Stir in the spinach, salt and the cooked onion and garlic mixture
6. Pour the mixture evenly into the mini muffin cups
7. Bake for 20 to 25 minutes, until the filling is set and golden on the top.  Serve.

These are delicious.  Great to add to the kids lunch box too.

I hope you busy moms out there find time for yourselves too.  We need it to be the great mothers that we are!


Thursday, January 10, 2013

Homemade Mac and Cheese

**There are some technical difficulties with attaching my photos to this blog.  I didn't want to go without sharing this great recipe with you.  As soon as the problem is resolved, I will repost with the photos.**

My kids are loyal Annie's Mac and Cheese eaters.  They've turned their nose at eveything else, including homemade.  Until now!

Recently a friend of mine gave me a rice cooker.  My initial intentions were to cook the obvious, rice.  But then I found a recipe for Rice-Cooker Mac and Cheese  It looked delicious, simple and fast.  So why not give it a go.

Rice-Cooker Mac and Cheese
via Weelicious
4 to 6 servings

2 cups uncooked pasta ( I used small shells, but any small pasta you'd like is good)
1 1/2cups low-sodium chicken broth (you can also use vegetable broth is you'd like)
1 tsp kosher salt
1 cup whole milk ( I used 1%)
1 1/2 cups three cheese blend, shredded cheese
Add - ins: chopped broccoli, cauliflower, carrots or butternut squash or frozen peas

1.Place the pasta, stock and salt into the rice cooker, cover and cook for 15 minutes (I used the brown rice setting, but white rice setting works as well)
2.Open lid, add the milk, cheese and any desired add-ins, stir to combine, close the lid and cook for 20 minutes.  You can add an additional 5 minutes if you prefer a golden crust on the bottom.  Serve.

The kids LOVED it!  Roman ate 3 bowls!  I served this along with sliced red peppers for a complete meal.

Such an incredibly easy dish.  You can be busy doing other things while the rice-cooker does the work for you.

Wednesday, January 9, 2013

After school snack

As much as I hated to see our vacation end; I did look forward to the return of routine.  We seemed to have returned to our groove with ease. 

Something I truly enjoy doing is making or baking the kids a nutritious snack for them to come home to.  My son's class eats lunch pretty early; so when he gets home he's famished!  I want to make sure both my kiddos have something to eat that will fill them up and is healthy for him too.

Rice crispy treats are a memorable favorite for me when I was a kid.  However, the store bought version is full of corn syrup and the recipe you make at home is loaded in sugary marshmallows.

This recipe uses Brown Rice Syrup to get it's sweetness.  Brown rice syrup is a healthy, natural alternative to sugar, honey, maple and corn syrup and molasses.  You can find it in natural food stores or sections of grocery stores.

The recipe also packs a nutritious punch from high-protein almond and peanut butters!


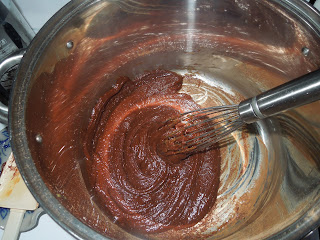
When the rice syrup and nut butters are heated, the consistency is very smooth and creamy.  Using a small amount (1/4 cup) of cocoa powder gives these treats the perfect amount of chocolaty goodness.


After letting the mixture set for about 5 minutes, I rolled it into balls for a different and fun change to the usual bar form.
 
The recipe made 16 balls.  There are only 3 left!  The kids and hubby gobbled them up. 
Try making these next time you make a healthy after school snack!

Tuesday, January 8, 2013

Chicken on a stick

Seriously, what kid (or kid at heart) doesn't like food on a stick?  For what ever reason, that stick makes the food on it much more appealing.  Serve it with something to dip it in and you're Super Mom!

My second recipe from the Weelicious Cookbook was Chicken on a Stick.  Using all natural chicken tenders made the chicken moist and delicious.

The breading was not breading at all but corn flakes!  My kids were skeptical about this.  "Corn flakes? On chicken?" Yes!  Plus it's wholesome and fiber full if you use a good quality cereal for the coating.  An extra bonus....these are baked, not fried!!  My husband (the kid at heart) claims this was the best chicken I've ever made.  He requests that all chicken be baked in corn flakes instead of bread crumbs.  Well.  There you have it.....these were a winner.


I didn't have buttermilk on hand. Instead I used milk with 1 tablespoon of lemon juice.  This worked great!

 
I put the corn flakes in the food processor and pulsed until they resembled bread crumbs. This was much easier than rolling over a bag of cereal with a rolling pin.

Lining a sheet pan with parchment paper eliminates the need to wash a dirty pan.  LOVE parchment paper!

I served the chicken along side Potato Pea Cakes.  Mashed potato cakes sprinkled with peas throughout.  A great, healthy alternative to french fries.  Absolutely fun and delicious!


As in the words of Guy Fieri, this was a "Winner Winner Chicken Dinner"!  Oh I'm such a goof ball.
Enjoy everyone! ;)

Monday, January 7, 2013

New Year, New Recipes!

I was very excited to receive the Weelicious Cookbook for Christmas!  My goodness the wonderful, healthy, kid friendly recipes I found in this book.  One evening, my parents, husband and I were all reading.  My mom commented on how they all were reading novels while I was reading a cookbook.  Yes!  I enjoy reading cookbooks from cover to cover.  Weelicious was no exception.  I 've been an avid reader of the Weelicious blog and now ecstatic to have her recipes in book form!

The first recipe I tried was Blueberry-Lemon Whole Wheat Pancakes.  These were a much welcome remembrance of spring during these Arctic cold days of winter.  I used blueberries from our freezer that we picked this summer.  The lemon juice and zest gave a lightness to the pancakes.  I used whole wheat cake flour instead of the whole wheat flour, just because I had it on hand.


I like to make pancakes in a "silver dollar" size.  They're easier and not as daunting for kids as a large pancake can be.
 
 
The only sweetener used in the entire recipe was 1 tablespoon of honey.  I love that!
These were delicious plain, or with a touch of maple syrup.
 
I will definitely be making these tasty cakes again!
 
Stay tuned for more recipes I've cooked up from this fabulous book!


Thursday, January 3, 2013

A New Year...A New Day

It seems like forever since I've been here.  Although I've missed this space, I've thoroughly enjoyed my holiday with family and friends.  As I hope you all have as well. 

I'm excited to share with you what we've been up to during vacation.  It has been great having all of us together, sleeping in, staying up a bit later than normal, cuddling, spending days in our pj's and birthday bowling; just to name a few.


May the start of your New Year be wonderful.  I look forward to spending the new year with you!